Getting Started
Before you begin, make sure you have:- A Tavily API key (sign up for free if you don’t have one)
- An OpenAI account with organization verification
1
Create a new workflow in Agent Builder
Navigate to Agent Builder and click Create New Workflow to begin building your AI agent.
2
Select the agent node in your workflow
Click on the agent node in your workflow canvas to open the configuration panel.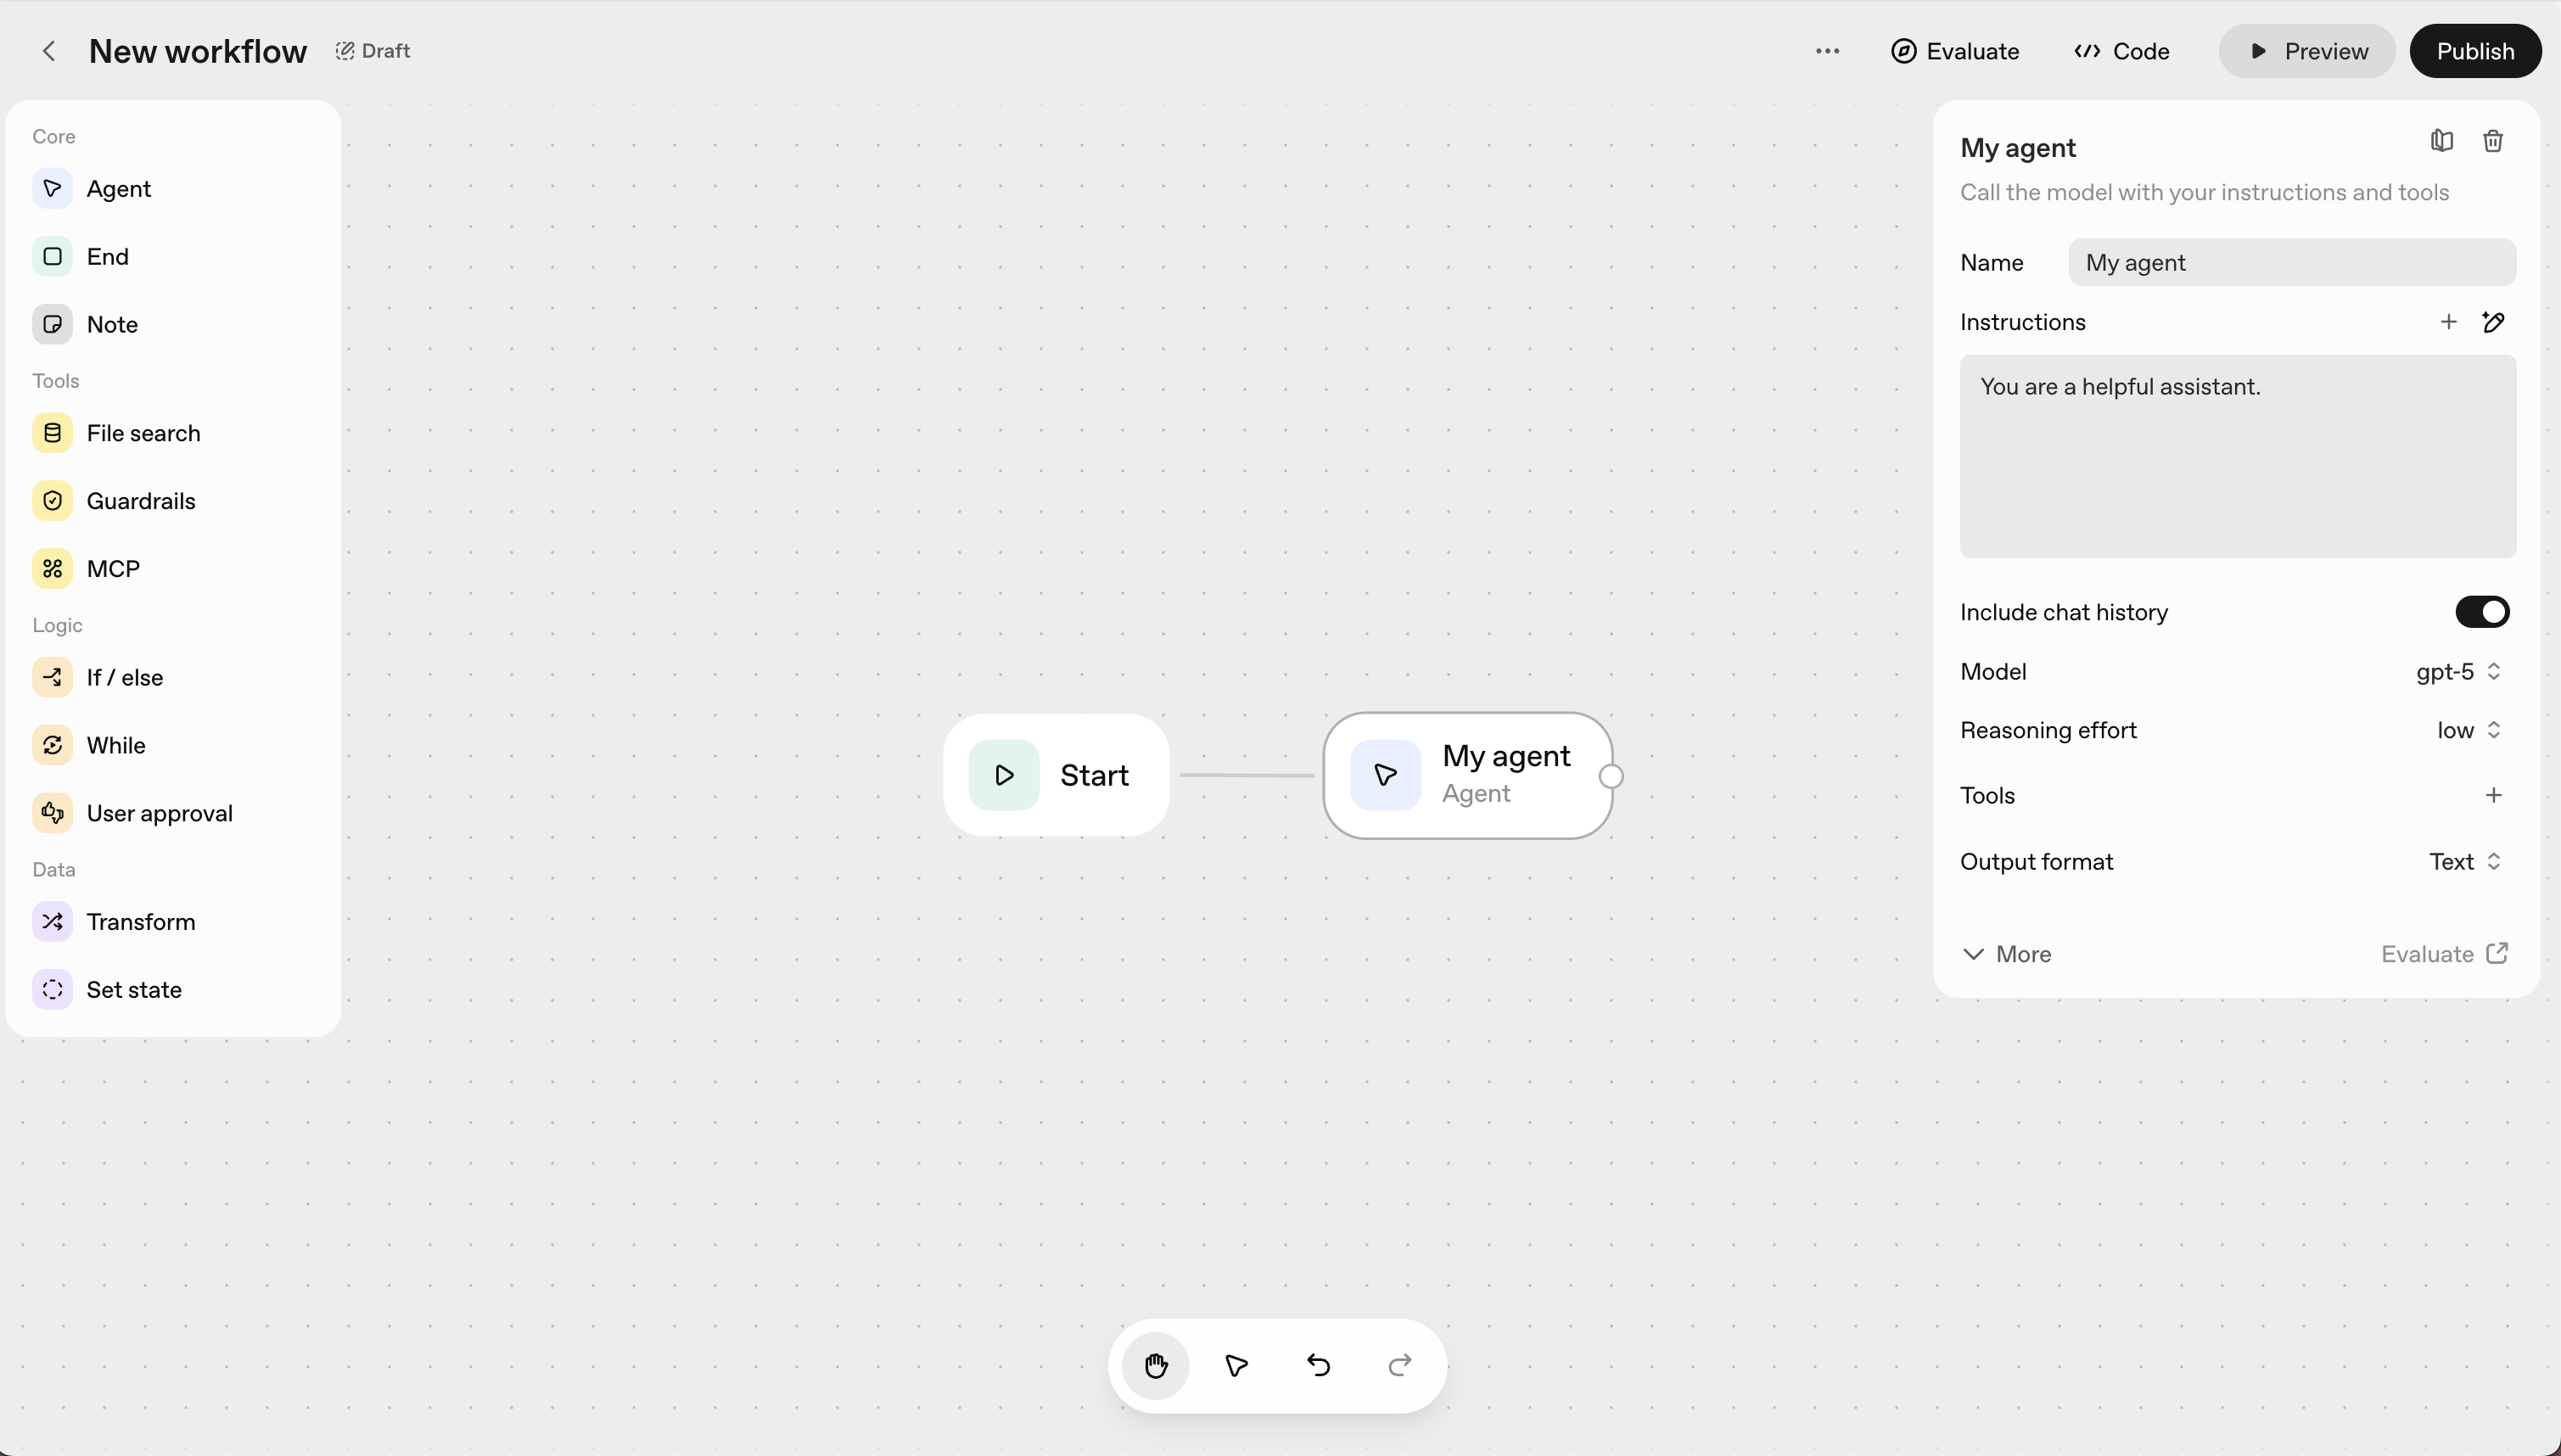
3
Open the Tools configuration
In the configuration panel, locate and click on Tools in the sidebar to add external capabilities to your agent.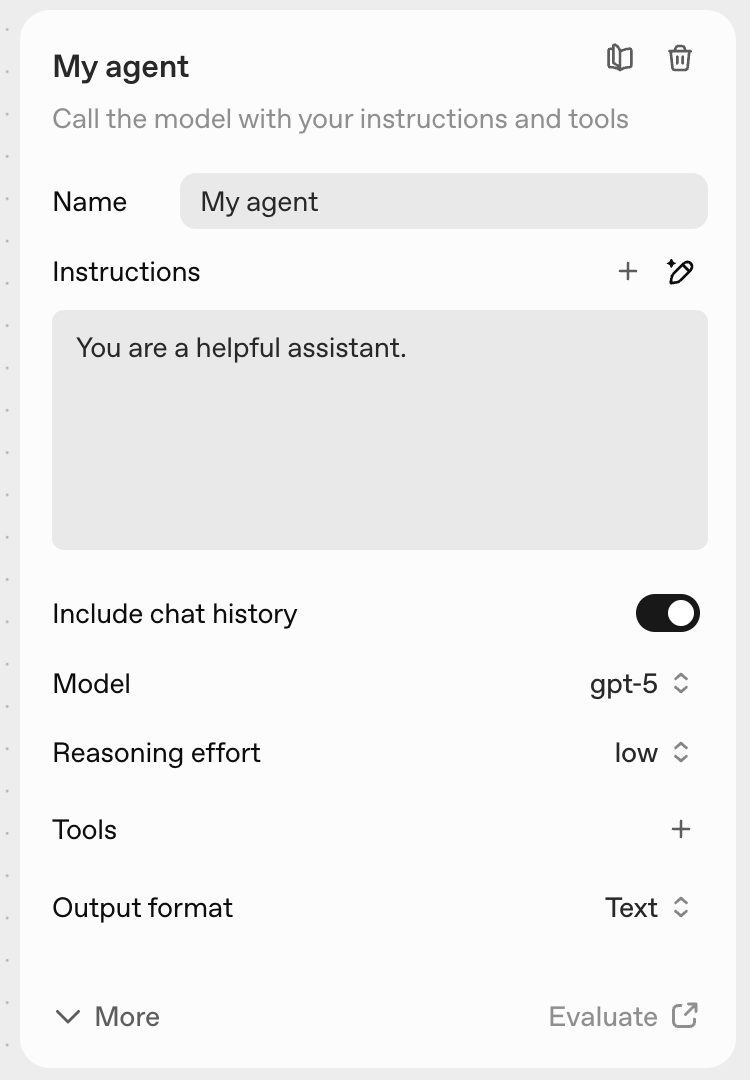
4
Connect Tavily's MCP server
In the MCP configuration section, paste the Tavily MCP server URL:Remember to replace 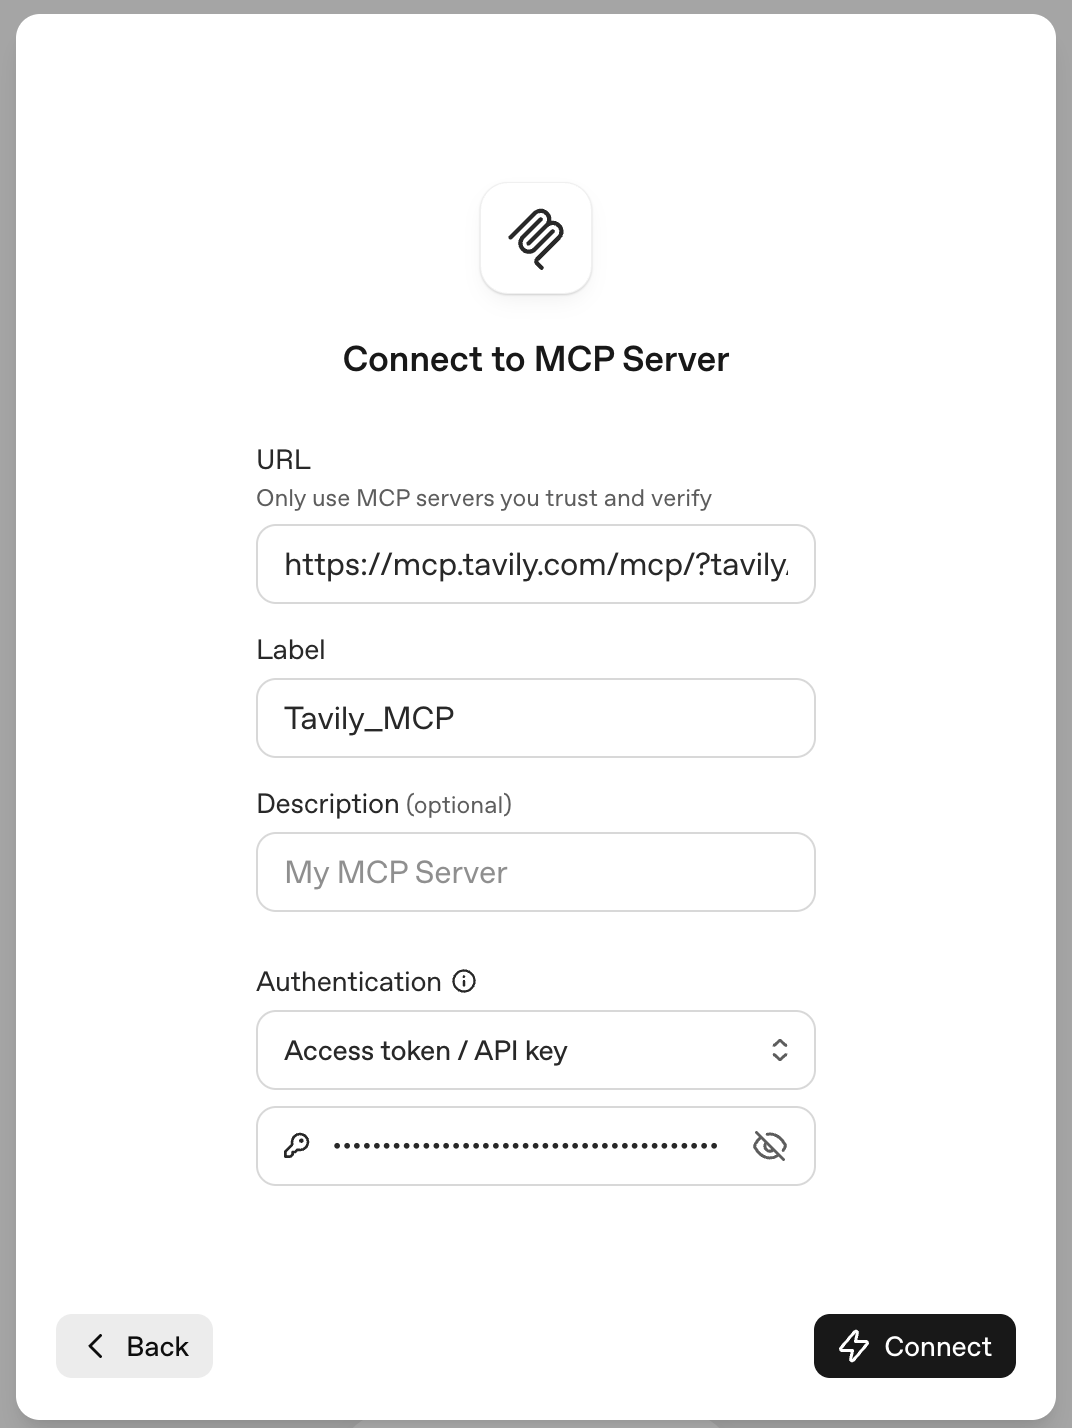
YOUR_API_KEY with your actual Tavily API key.Click Connect to establish the connection to Tavily.5
Enable Tavily capabilities for your agent
Once connected, you’ll see Tavily’s suite of tools available: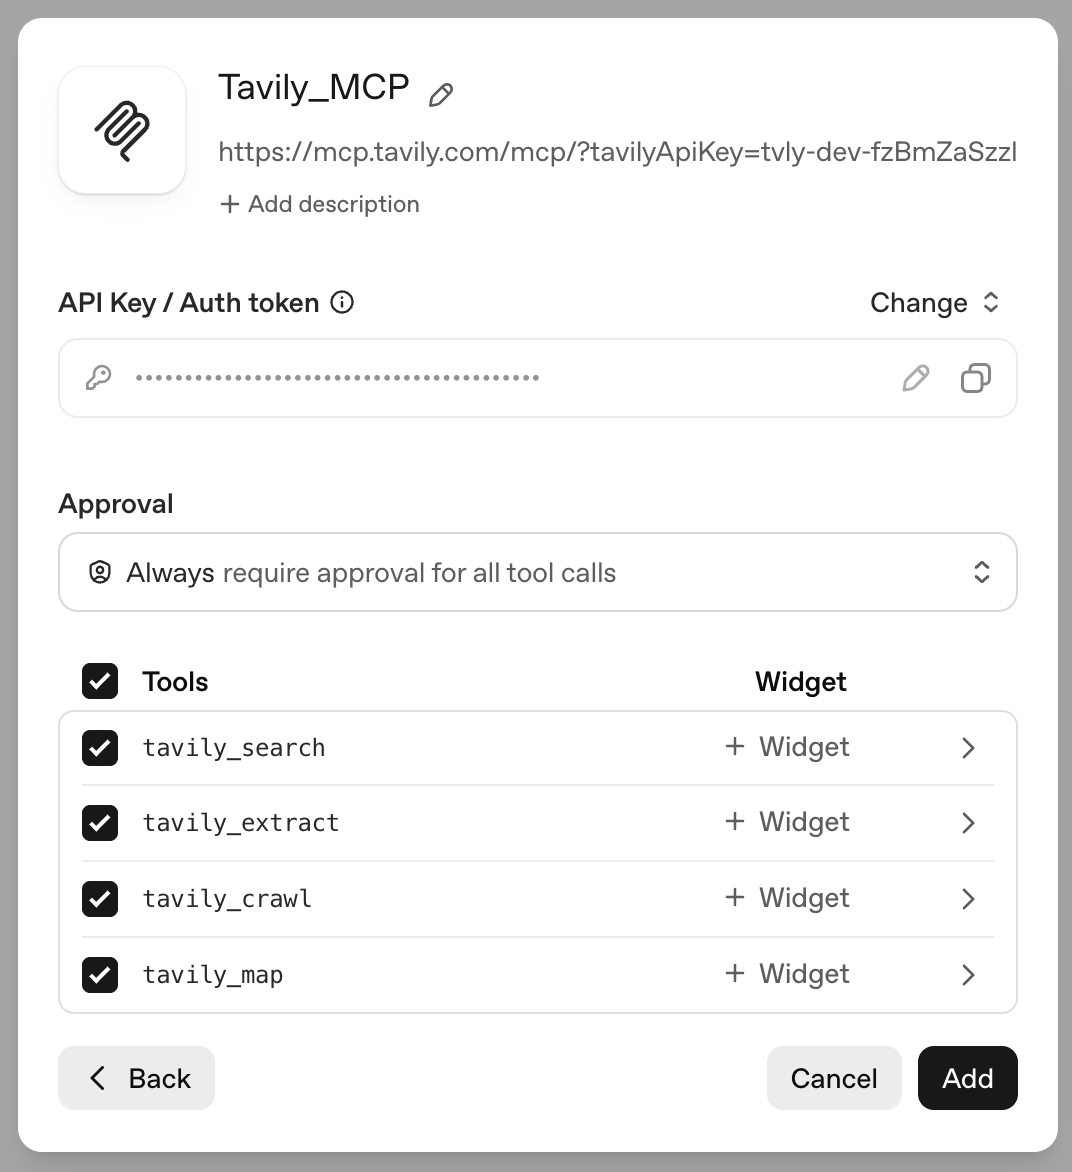
- tavily_search - Execute a search query.
- tavily_extract - Extract web page content from one or more specified URLs.
- tavily_map - Traverses websites like a graph and can explore hundreds of paths in parallel with intelligent discovery to generate comprehensive site maps.
- tavily_crawl - Traversal tool that can explore hundreds of paths in parallel with built-in extraction and intelligent discovery.
6
Customize your agent's behavior
Now configure your agent: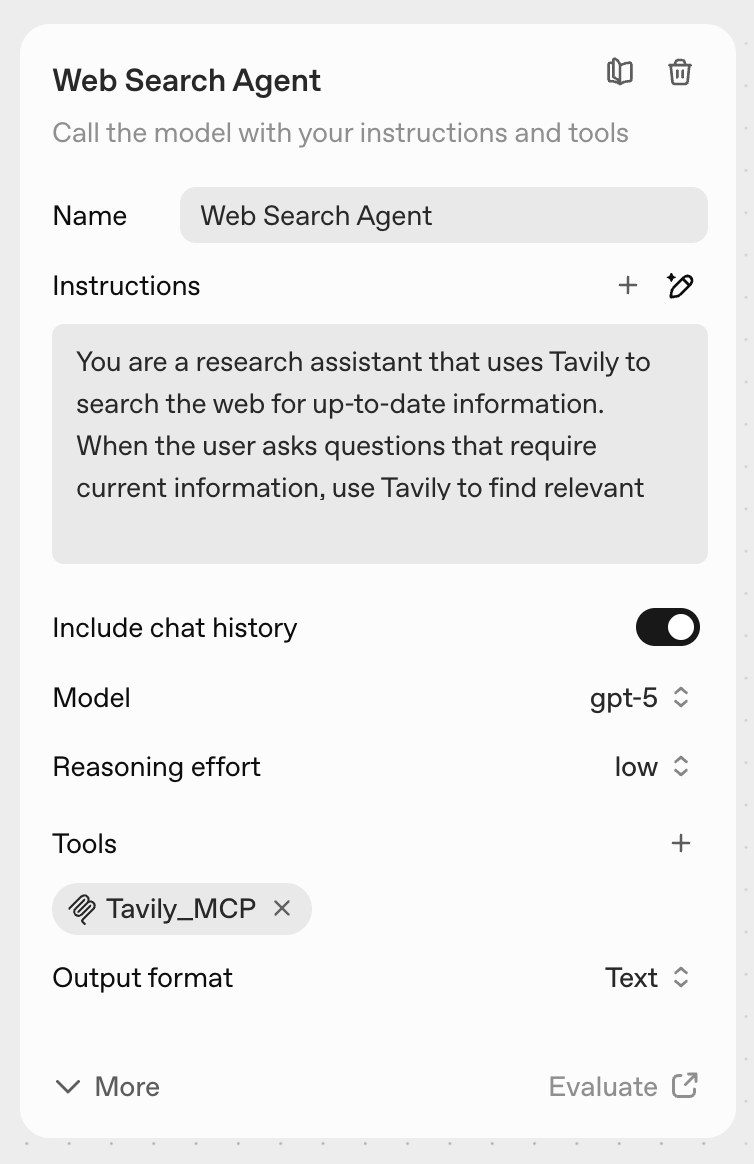
- Name: Choose a descriptive name for your agent
- Instructions: Define the agent’s role and how it should use Tavily’s tools
- Reasoning: Set the appropriate reasoning effort level
- Click Preview to test the configuration
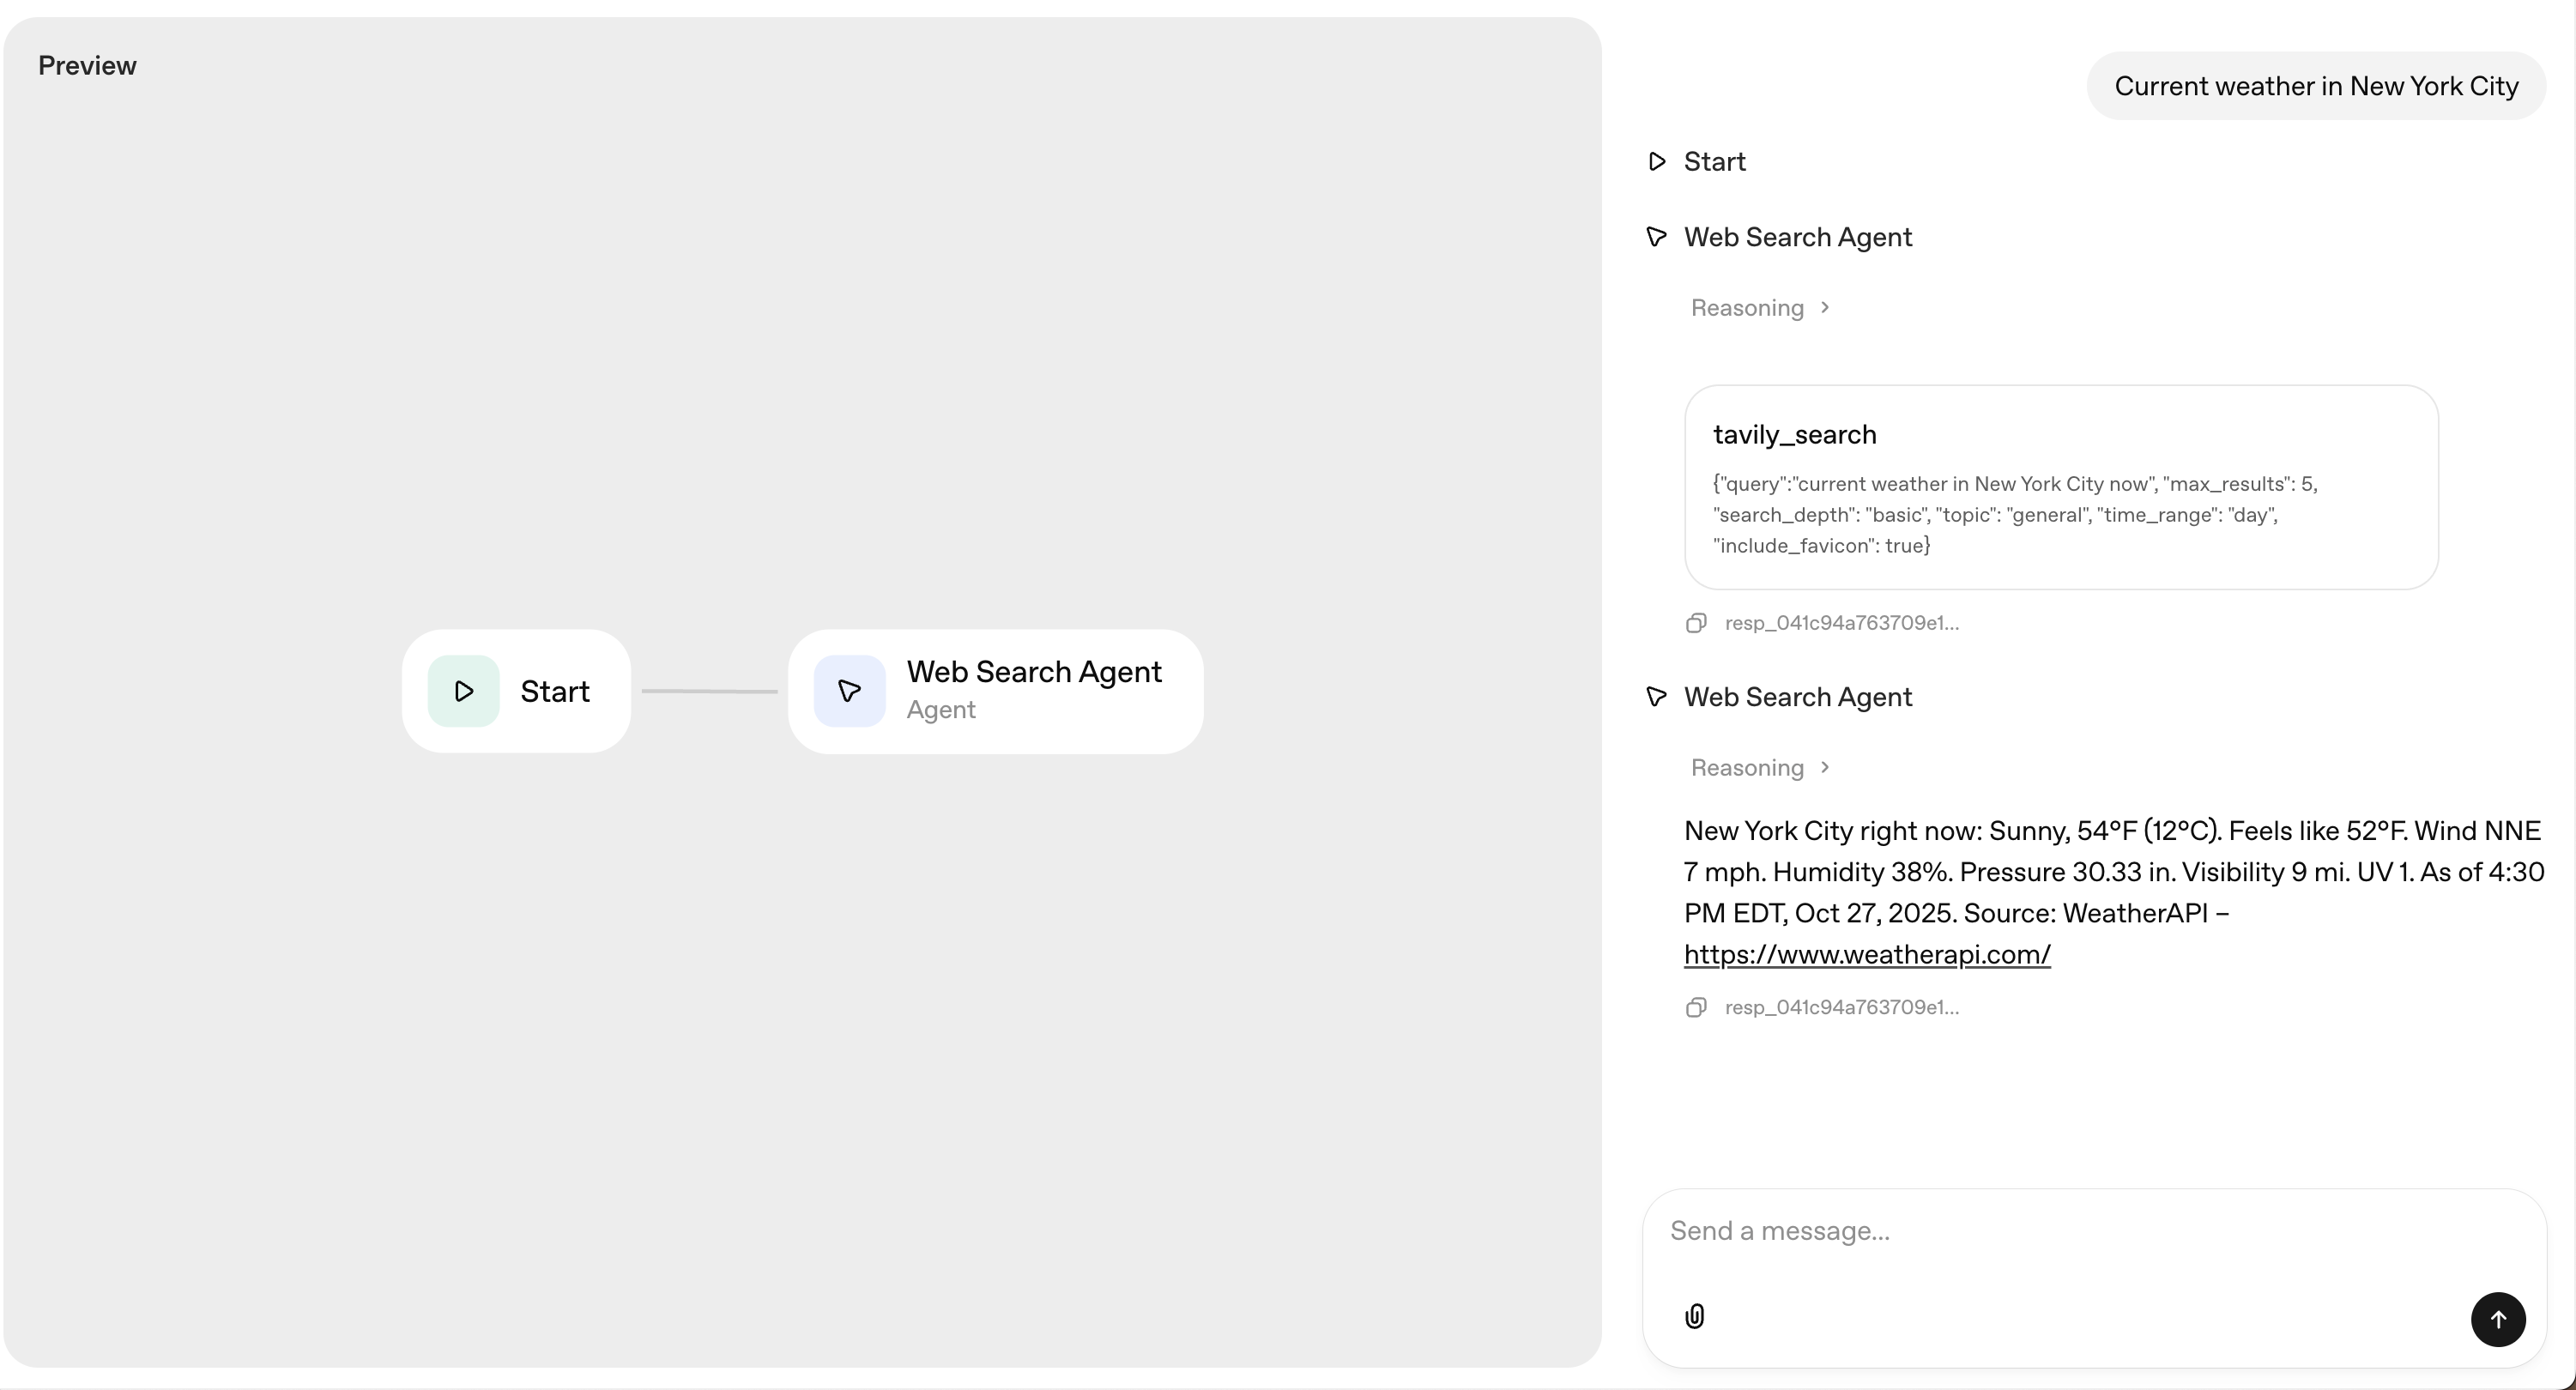
7
Verify your agent works correctly
Test your agent with queries that require real-time information to verify everything is working as expected.